This guide will explain how you can go about configuring your Proofpoint PhishAlarm Button, the configuration steps will cover:
- Appearance
- End-user notifications and email handling
- Email forwarding
- Safelisted emails
To start the configuration:
- Login to your Proofpoint account
- Click on Security Awareness in the left hand navigation
- Launch the Security Awareness Portal
Once you have launched the Security Awareness Portal, in the top navigation click Alerting> Add-in Setup
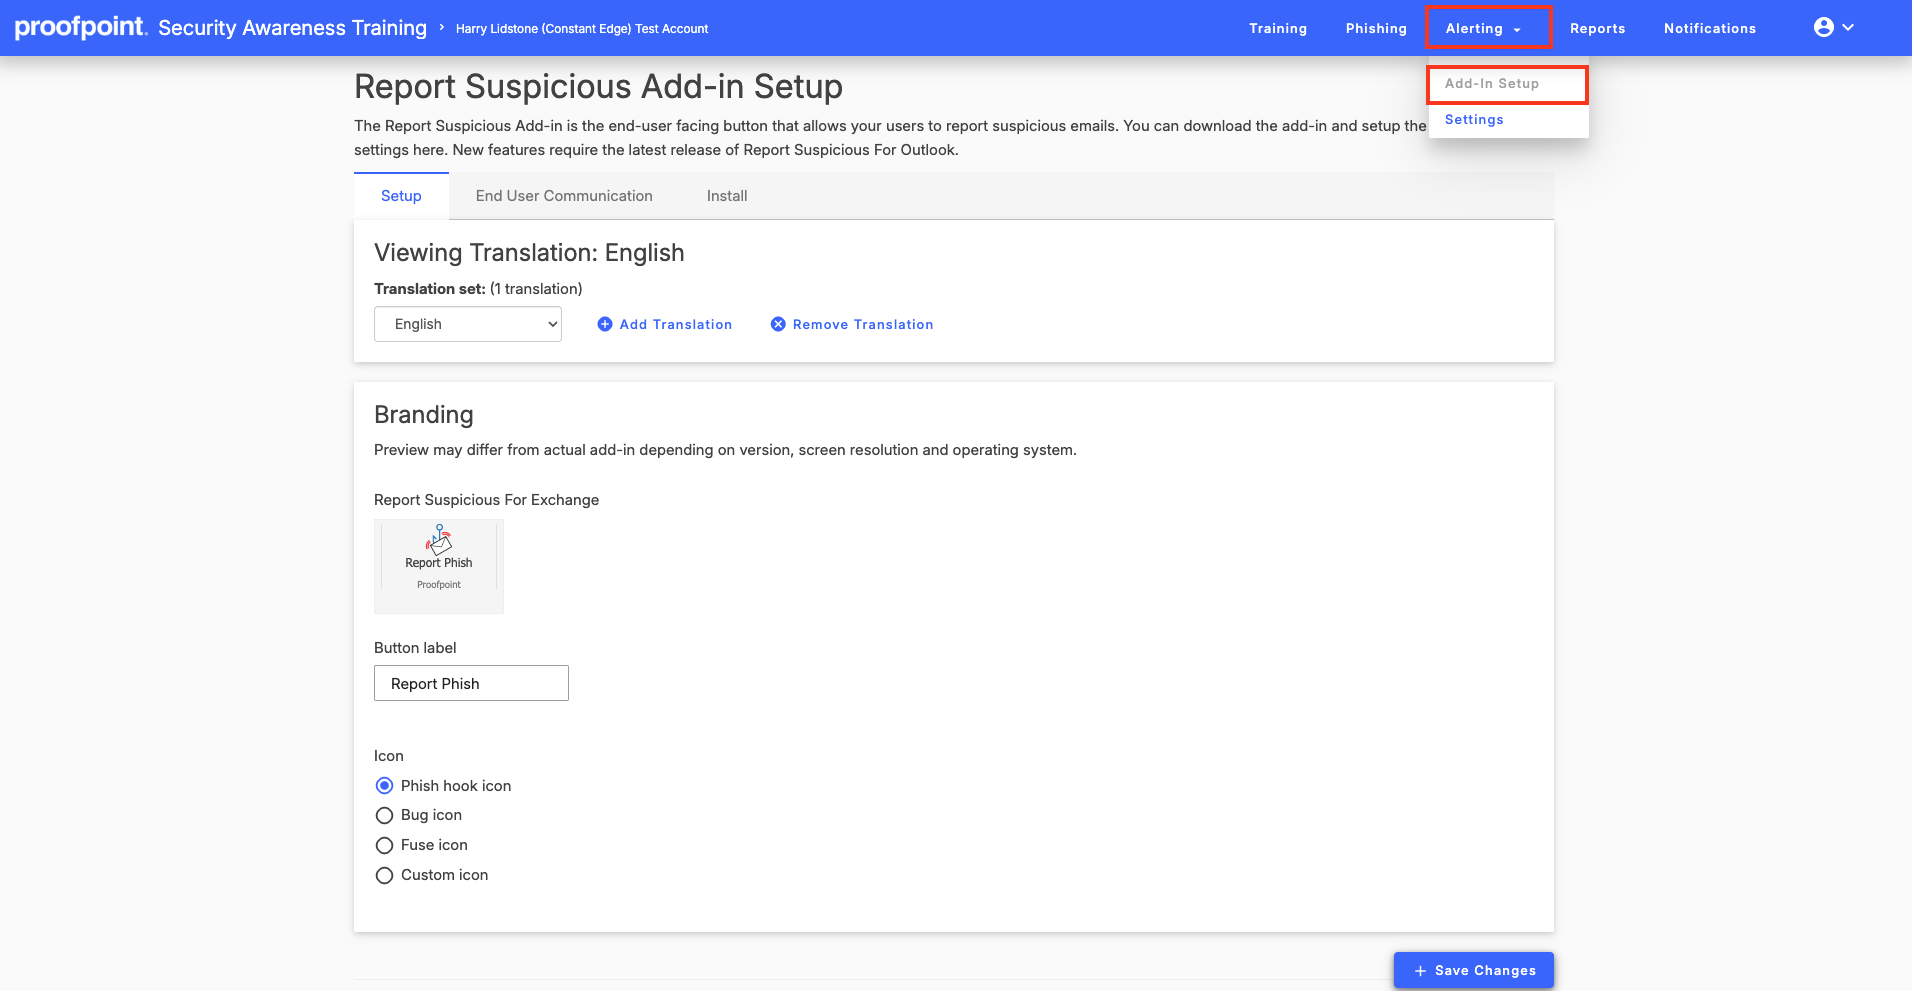
Language Selection
Click on the drop down bar to select the language you want the viewing translation to be. You can customise the information in multiple languages to address the localisation needs of your end users by repeating these steps below for each language needed.
Branding
In this section you can view how the phishing report button will look in exchange. You have 3 design icons to pick from or you an upload your own custom icon.
Use the Button label field to customise the text that is displayed on the actual PhishAlarm button. By default, this field will display the wording, Report Phish, in the language selected in the previous step. You can customize the text to meet your needs or keep the default text.
Once you have made your selections, click on Save Changes.
End User Communication Configuration
Click on End User Communication to customise this section.

End-user communications are the feedback messages that display for users after they report an email using the PhishAlarm button. There are multiple end-user messages that may display, all of which are customisable. You can define:
• Which message displays depending on the type of email the user reported.
• How the notification message is delivered to the user, such as by pop-up message or an email.
• What will happen to the email after it is reported, such as deleting it from the user’s Inbox or moving it to a junk folder.
For example, in the image below, you can customise the pop-up message that appears to the end user after they successfully report a simulated phish sent as part of a phishing simulation campaign. Alternatively, you can keep the default text shown in the field.
You can also customise the Email Handling; the action taken on the email after it has been reported.

Once you have customised the notification settings, click on Save Changes to keep the settings entered on the page
Report Suspicious Email Settings
When end users report emails using the PhishAlarm button, you can configure forwarding options for each type of email, such as simulated phish, potential phish, safelisted, or training.
Use the steps below to configure the email forwarding options for PhishAlarm.
To access the Report Suspicious Settings, click on Alerting>Settings>Admin Communications

In the Reported Email handling section, use the table below to select how you want PhishAlarm to handle the emails reported by end users for these email types:
- Potential phishing email handling
- Simulated phishing emails (from Phishing Simulation)
- Safelist email handling
- ZenGuide Proofpoint Security Awareness training emails
Safelist Configuration Guide
Safelisting allows you to create rules that designate specific email addresses, domains, or IP addresses as trusted. This prevents legitimate messages from being mistakenly reported as phishing.
To start Safelisting:
In the Security Awareness Training portal, go to:
PhishAlarm > Settings > Safelist tab
Here, you'll see the interface to configure safelist rules.
How to Create a Safelist Rule
- Log in to the Security Education Platform.
- Go to PhishAlarm > Settings.
- Click the Safelist tab.
- Under "Configure a New Safelist Rule", fill out the following fields:
- Name: Enter a title for the safelist (e.g., “Company Safelist”).
- Condition: Choose how to match the email:
- Subject Line – Match based on the subject of the email.
- Header – Match based on specific information in the email header.
- Criteria:
- Starts with – Matches if the value is at the beginning.
- Contains – Matches if the value appears anywhere.
- Advanced (Regex) – Use regular expressions (not recommended for most users).
- Value: Enter the text or data to match. Note: Matching is case-sensitive.
- Click Add another condition if you need to include more than one rule. All conditions must match for the email to be safelisted.
- Choose whether users are allowed to report emails that match this safelist rule.
- Click Create Safelist.

Managing Existing Safelists
Once saved, the safelist will appear in the table at the bottom of the page:
- Edit existing safelist entries.
- Delete safelist entries you no longer need.
Important Notes
- Changes take effect once users restart their email client.
- Available in platform version 3.115 or later.
You have now completed the configuration steps for the PhishAlarm Button
To read more guides on how to add the PhishAlarm Add-in for Office, click on the link below:
Setting up the Proofpoint Phishing Button Add-in for M365